Shop Talk: Good Photography Gets Your Work Selected
March 20, 2015
 Planning to enter your work in SDA’s Materialities catalog & exhibition call-for-entries due April 15, 2015?
Many artists and designers are their own worst enemy when it comes to submitting their work for juried exhibitions, awards and residencies. Even the best work suffers when misrepresented by poor photography.
This is compounded by the fact that many makers don’t understand what a pixel is or how to size a digital photograph to meet submission requirements. It’s all about understanding – then following – the directions.
Here are some basic dos & don’ts for photographing your artwork (whether in analog or digital format) followed by some nuts & bolts on sizing and formatting digital images:
DO
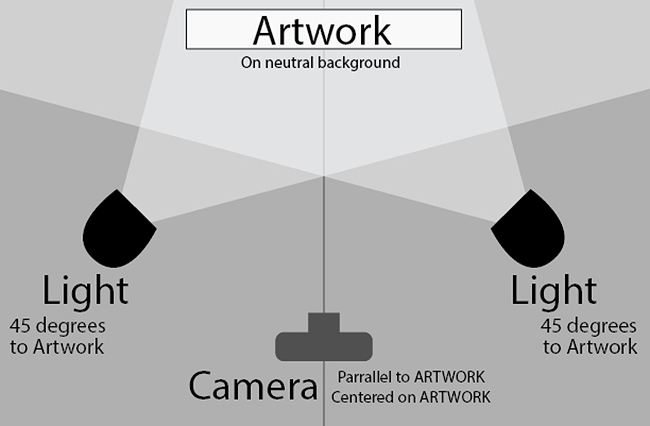
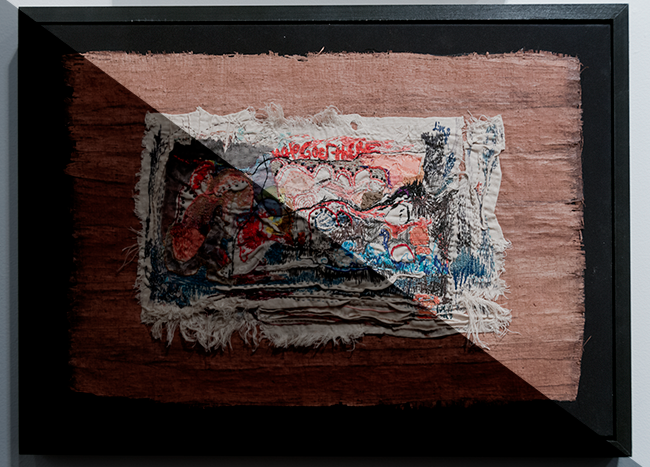
try to find a neutral background with even 45 degree lighting. For 2-D works, it’s important to keep the camera centered and parallel to the artwork to prevent any kind of visual distortions.
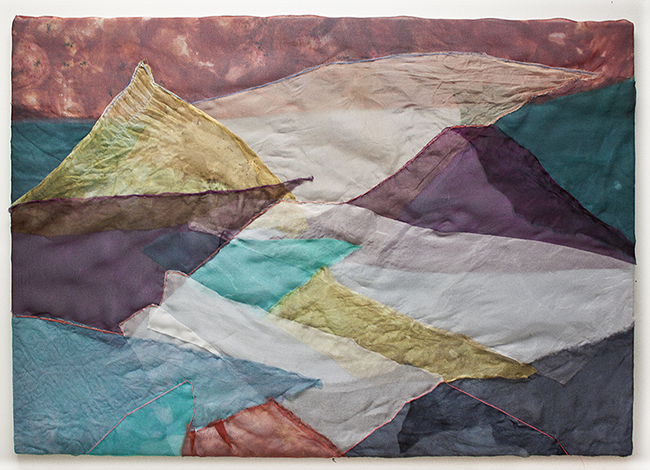
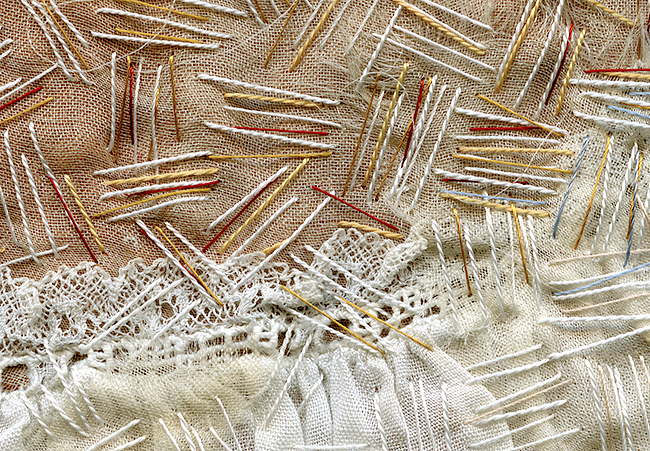
This setup shown above was used to produce the evenly lit results below that show the richly-textured embroidery to best advantage.
DON’T
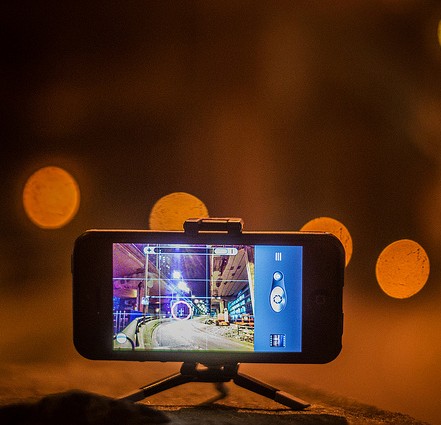
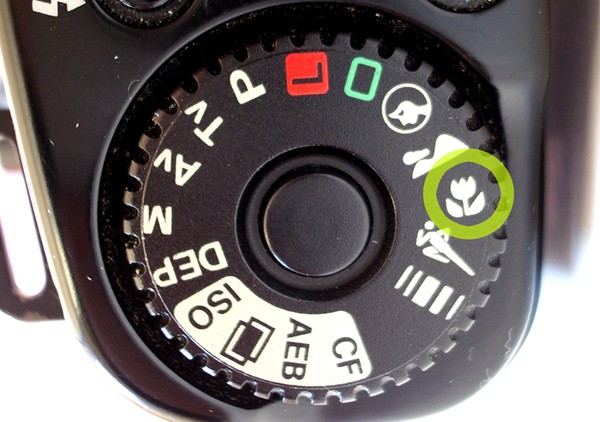
forget that many cameras (yes, even smartphones) have the ability to capture details in your work!
Look for a “Macro” setting on your camera for close-up shots; it is usually represented with a flower icon. You may have to manually select that feature depending on your camera make and model.
DO
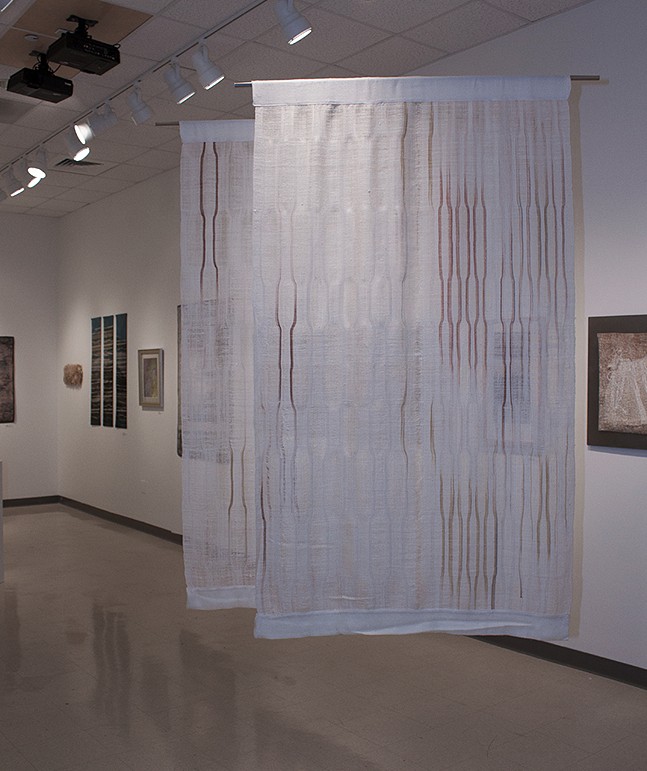
consider including installation shots from past exhibitions that are useful for showing scale, depth or an unusual method of presentation.
DON’T
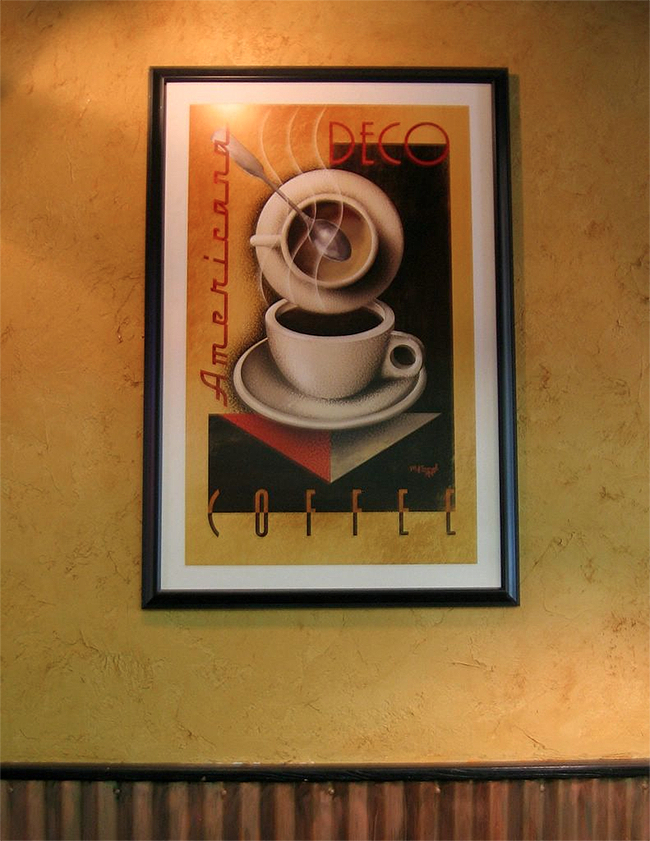
photograph your work in homey environments like draping your work on a couch or leaning it against a fireplace UNLESS the context for the work is important (i.e. installation, site-specific, performance). Try to fill as much of the camera viewfinder with as much of your work as possible.
DO
remember to take the time to review your image for color accuracy. Some simple tools to adjust color temperature, contrast and sharpness can be found in many image editing programs like Preview (for Macs) or Adobe Photoshop.
For a helpful overview on adjusting color temperature & white balance in your camera,
check out this article on wikiHow.
To find a graphics program to help you adjust color temperature, check out this overview of 10
non-Photoshop software options here.
DON’T
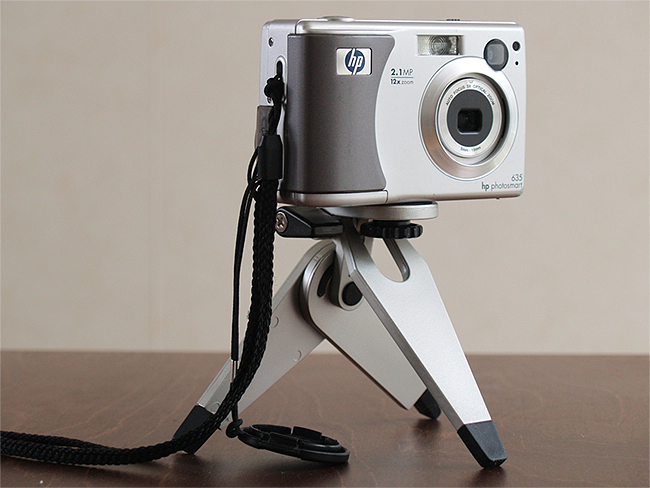
forget to use a tripod to keep your camera stationary while shooting. Even a small tripod will suffice – you don’t need expensive equipment!
And don’t forget to disable your flash unless it’s absolutely necessary.
Find a helpful overview of standard tripod options via B&H Photo here.
Find recommendations for 5 best table-top (mini) tripods here.
 DO
DO
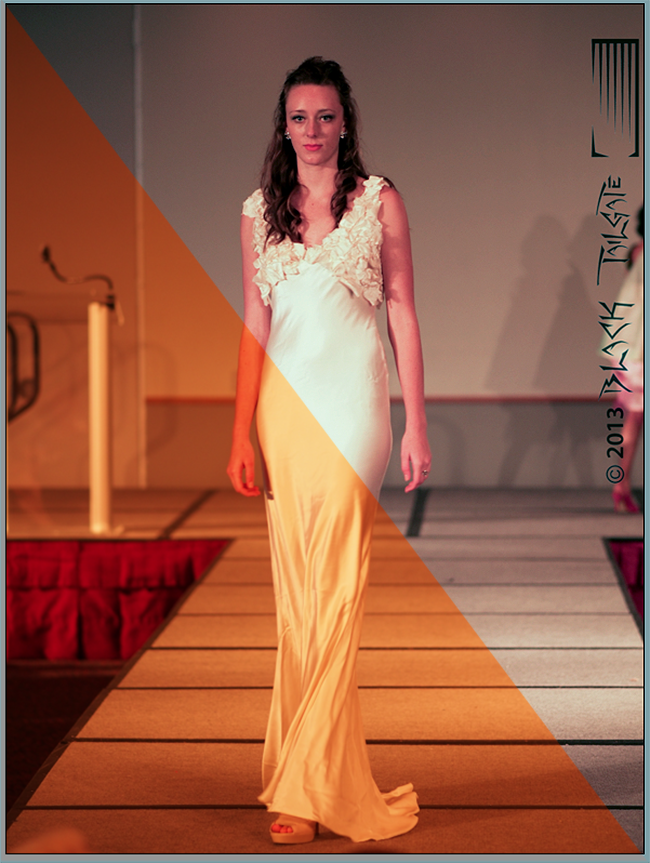
remember that the type of computer you use can affect how an image looks.
Mac computers tend to display images lighter than Windows computers.
MAC USERS: if your imagery is already dark then it may look darker on a Windows computer.
Windows computers tend to display images darker and with higher contrast.
WINDOWS USERS: remember that if your image is super bright it may look washed out on a Mac computer.
BEST PRACTICE:
The best thing to do is to test your images on a number of different computers (Windows vs. Mac) and devices (smartphone, tablet, laptop) before you upload them to the submissions application.
———————————————————————————————————————————
THE NUTS & BOLTS OF SIZING & FORMATTING DIGITAL IMAGES:
It’s hard to avoid the digital realm these days. With slide film nearly extinct and the cost of digital imaging technologies dropping, most artists have access to digital cameras. Ubiquitous smartphones are equipped with better cameras than what was available to us just a few years ago.
Most juried exhibitions and other competitions will ask for digital imagery – submitted online, via email or on a disc.
The benefits of moving to digital are numerous – but there is a learning curve.
Understanding a few basic concepts can improve your chances of being selected!
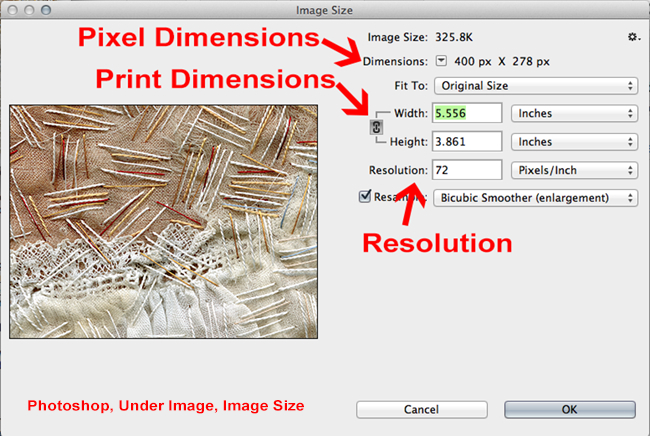
1. There are 3 ways of measuring digital images:
Pixel dimensions refers to the total number of pixels running vertically and horizontally across the image.
Print dimensions refers to the dimensions required for your image to print well.
Resolution or “pixels per inch” (ppi) refers to the total number of pixels in an inch of a digital image. The more pixels per inch, the more detail an image will have.
Quick tip: dpi (dots per inch) and ppi (pixels per inch) are NOT THE SAME THING. Dpi refers the smallest unit or dot a printer can print; ppi is the number of pixels displayed in an inch.
Get more detail about these definitions in an excellent overview here.
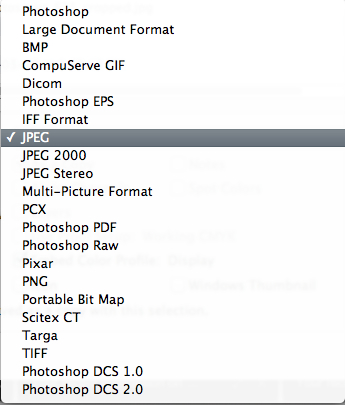
 2. Choose the correct file format!
Most Calls-For-Entry will ask for specific file type and size. When you are working with digital images, it is important to understand how the format of the file can adversely affect quality, size and edit-ability of your images.
Just changing the 3 characters following a file’s name IS NOT CHANGING THE FORMAT. You must use a program designed to save your image in the format you need.
The most common file format is a jpg. This format supports millions of colors. When saving this file format, you should be presented with an option of sizes to save in.
The downside is that the jpg format utilizes a “lossy compression” – which means you are throwing away information you are never going to get back. This makes the size of a file small enough to load quickly on the Web, but you lose quality every time you save a jpg – so it’s a good idea to keep a copy of the original file around if you need it.
 Lossless files (i.e. gif) also compress the file upon saving, but all the information is maintained. This means no loss of detail when you open the file at a later date. Unfortunately, the gif format only supports 256 colors – so it’s an inappropriate format for saving photographic imagery. GREAT for cartoon characters – but your work is not a cartoon.
For additional information on understanding file formats, click here.
3. A good rule of thumb: the larger the file, the clearer the details.
Yes, bigger is sometimes better – but the downside to big files is the amount of time they take to upload online, the amount of space needed to save them onto your computer (or some external device) and just the general amount of memory to view, edit and save them.
 Many email programs have limits on the size of the file you can send or receive. Programs like Gmail or Outlook will either prevent you from sending an overly large file or block any incoming emails with extra large files.
Finally, creative people often find “reading the manual” tedious – but it’s important to follow the submission guidelines carefully.
When in doubt – email the event administrator to make sure!
Jurors may never even see badly photographed entries – or those that do no adhere to required guidelines. Don’t let this happen to your entries!
SDA NewsBlog is full of expert advice that supports your creative growth!
Get the complete scoop from Lynne Bruning on protecting your photo’s copyright with traditional watermarks here.
Get additional tips, also from Lynne Bruning, for entering competitions and applying for awards here.
Get excellent information from Patricia Malarcher on shipping your work to exhibition venues here.
Let Della Reams get you up to speed on how to write a press release here.
Find Materialities: Contemporary Textile Arts catalog & exhibition call-for-entries plus many other competitions and opportunities on SDA Website Calendar.
_________________________
 LM Wood is an experimental artist living and working in North Carolina – as well as SDA Website Manager. Originally from Minnesota, she pursued a variety of careers before discovering art in college. She received an MFA in Photography from University of Cincinnati and an MFA in Fibers from Southern Illinois University in Carbondale, IL. Having been educated in a variety of diverse artistic styles and practices, Wood navigates between the domains of art, craft and technology. Her work is a blend of digital technologies and traditional processes, resulting in hybrid works that elevate process and craft to “high art”.
Wood has presented and exhibited her work nationally, including exhibitions at Museum of Design (Atlanta, GA), Center for Craft, Creativity and Design (Asheville, NC) and North Dakota Museum of Art (Grand Forks, ND). She has also won several awards for her experimental works, including a grant from Kentucky Foundation for Women for her earlier research into combining digital technologies and traditional photographic processes and a Visual Arts Fellowship from North Carolina Arts Council for her digitally printed fabric quilts.
She joined the faculty at Elon University (NC) in 2000, where she has taught digital art courses including: Introduction to Digital Art, Static Imaging, Interactive Art and Web Art. She has conducts courses in The Study of Fibers, Advanced Projects in Fibers, Professional Practices and Senior Seminar.

8 Comments
Miki says
March 22, 2015 at 5:13 pm
LM, this is one of the best and clearest articles I've read that demonstrates (in writing) the steps in photographing art work. It's well written and translates easily into layman's terms, in my opinion. Thank you.
Peggy Cox says
April 4, 2015 at 8:21 am
Thanks. Now if we can only get MAC and WINDOWS to play nicely with each other.
Mia Tsangaris says
April 4, 2015 at 1:11 pm
Helpful article. Thank you very much. I have send tons of pictures with Binfer several times. It’s a nifty little tool. A must have photo sharing software
Ruth Miller says
April 9, 2015 at 11:23 am
I tried out your instructions on my mac as I was reading and it was indeed as simple as you said it would be. Now I feel infinitely more professional. Thank you.
Candace Edgerley says
April 30, 2015 at 8:51 pm
Thanks, LM, for the great article. It helped in preparing my images to enter the next conference exhibition!
jasmine says
October 4, 2015 at 3:40 am
For quick edits you can also use new browser based Free Photoshop Online Editor known as toolpic. You can easily get familiar with it as it is same as pixlr but includes all pixlr features - for free. Hope it helps your user also.
Entering A Show – Good Photography Gets Your Work Selected « Surface Design Association - Washington says
February 25, 2016 at 4:41 am
[…] Shop Talk: Good Photography Gets Your Work Selected […]
Della says
March 3, 2016 at 10:46 am
Great reminder and checklist on how to prepare photos. Thanks.
Related Blog Articles
Making It
Inkodye + Me: A Love Affair With Transparency
Making It
*Feng Shui* Your Studio To Maximize Creative Flow
No Thumbnail Available
Making It
The Textile-Driven Life: Jessie Fair Designs for H&M…& for ShiboriLove